After a couple of weeks, I’ve finished the Image Bank editor on the SurgeED tool… Took a bit longer than I was expecting, mainly because I had to add to the editor system the concept of child entities, with all the copy/delete/undo/redo/explorer issues associated with it…
But first of all, what’s an image bank (IB) and why do I use them?
Well, one of the main things you can do to increase performance in any engine (be it 2d or 3d) is to reduce the number of primitive drawing calls… I’m not talking about actual primitives, but calls to the function that draws them… That requires a call to the low level system, and that call has a fixed setup time, no matter how many primitives you render in that call…
So, it’s better to create a single buffer with 1000 primitives (sprites in case of 2d) and draw that, than have 1000 buffers and draw them all… The performance increase is in several orders of magnitude…
This process is called “batching”…
But to draw 1000 primitives in a single draw call, they have to share every render state (which includes all the like render properties, more importantly, the textures).
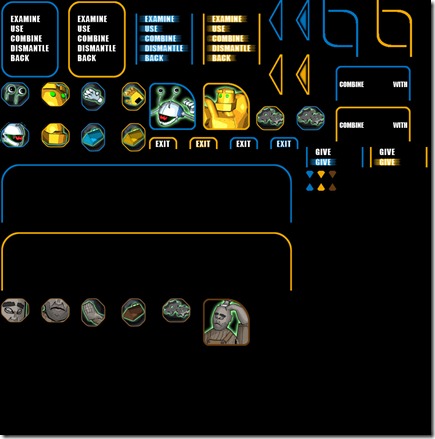
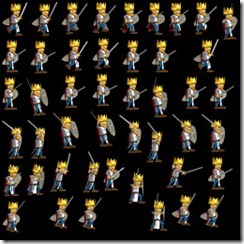
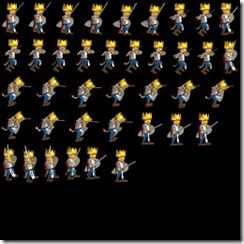
So, to draw 1000 primitives, they have to share the same texture, and this is done through creating an atlas, which is a single texture that has loads of images in it. Then, using UV mapping, we can index the separate images and use them in a single draw call to draw different objects… Below you can see an example of this:

This is accompanied by a file that describes where each of the individual images is:
<image_bank name="bm_gui_ib" delete_textures="false" normalized_coords="false" read_textures="true">
<source>
<layer type="diffuse">bm_gui</layer>
<images>
<image name="b_inv_arrow_s" x="703" y="0" sx="32" sy="95" hx="0" hy="0"/>
<image name="b_inv_arrow_u" x="639" y="0" sx="32" sy="95" hx="0" hy="0"/>
<image name="b_inv_btn" x="191" y="288" sx="61" sy="71" hx="0" hy="0"/>
<image name="b_inv_combine" x="795" y="152" sx="184" sy="85" hx="0" hy="0"/>
<image name="b_inv_exit_s" x="639" y="320" sx="73" sy="31" hx="0" hy="0"/>
<image name="b_inv_exit_u" x="543" y="320" sx="73" sy="31" hx="0" hy="0"/>
<image name="b_inv_menu_s02" x="319" y="32" sx="142" sy="25" hx="0" hy="0"/>
<image name="b_inv_menu_s03" x="319" y="57" sx="142" sy="23" hx="0" hy="0"/>
<image name="b_inv_menu_s04" x="319" y="80" sx="142" sy="24" hx="0" hy="0"/>
<image name="b_inv_menu_s05" x="319" y="104" sx="142" sy="24" hx="0" hy="0"/>
<image name="b_inv_menu_s06" x="319" y="128" sx="142" sy="24" hx="0" hy="0"/>
<image name="b_inv_menu_u01" x="0" y="0" sx="142" sy="32" hx="0" hy="0"/>
<image name="b_inv_menu_u02" x="0" y="32" sx="142" sy="25" hx="0" hy="0"/>
<image name="b_inv_menu_u03" x="0" y="57" sx="142" sy="23" hx="0" hy="0"/>
<image name="b_inv_menu_u04" x="0" y="80" sx="142" sy="24" hx="0" hy="0"/>
<image name="b_inv_menu_u05" x="0" y="104" sx="142" sy="24" hx="0" hy="0"/>
<image name="b_inv_menu_u06" x="0" y="128" sx="142" sy="24" hx="0" hy="0"/>
<image name="b_inv_menu_u07" x="0" y="152" sx="142" sy="33" hx="0" hy="0"/>
……………
The hotspot describes where is the “grip point” of the image, which is helpful for rotations and just general positioning.
An image bank then gives “names” to the images and says to the system where it can go get them (in terms of texture and positioning). A single image bank can use several textures:


This helps with the organization of the image banks…
One thing I added in the process of adding an editor for this (more on this later) was the ability of a single image have different layers (like diffuse, normal, etc). This will be helpful to define a decal system later, since I need both textures to create a really good decal, and I didn’t want to create separate systems…
Basically an image can have multiple layers, the only restriction being that all the layers have to have the same size.
Up until now, the artists would create these Image Banks by hand, positioning images in a big image and creating a text file by hand, specifying where each element was. This was time consuming and very error-prone, and this was one of the motivations for the image bank editor.
The way the image bank editor works is very straightforward… You create an image bank component, and add pages to it… Each page can have different sizes and support different layers. Then you import images to a specific page (with all layers being a different source DDS image). Then you can move the images around, using the normal tools of the trade (snaps to grid, to other objects, padding support with visual warning where two images are overlapping, etc)…
When the artist is satisfied with the image bank, he can “Generate” it and the system will create the atlas and XML file, and it becomes available to all the editor system. The component can then be deleted (it can always be created again from the image bank), or left alone.
You can also add mountpoints on the images. On the sample above, you can see the character has a sword on his hand, but if we had a character that could yield a sword or an axe (for example), we could add a mountpoint to his hand and in the game run time, attach another object to a specific mountpoint.
I’m very proud of the editor as a whole, and this component is very cool in action, since I believe it will cut down development time for 2d games a big deal (artists could lose up to 3 or 4 hours creating an atlas by hand, and add 2 more hours or so due to small errors, like a wrong position (easy to spot) or a wrong hotspot (harder to spot)).
You can see the editor in action above… the frame rate is crap, think it is because of the on-the-fly encoding… This component doesn’t perform as well as I’d want, but it’s easy to understand, considering that each image has to be drawn separately (in its own draw call), because we’re trying to create the image bank that will solve that problem in game…
Next stop in my travels in game development land will take me to rebuilding the fonts for Something Fishy, so I can start trying to port the game to tablets.
![]()


