RSS
 

Archive for the ‘Development’ Category

Ambient Occlusion Maps

10 Feb

I’m back to rendering pipeline for our current project… this time: Ambient Occlusion Maps.

Ambient occlusion is the small dimming of ambient light in areas where the ambient light couldn’t reach…

Basically, ambient light exists to simulate the effect of trillions of photons bouncing off the objects in an area, so in fact, simulating indirect light. Note as a room is not completely dark in areas not illuminated directly by the window… that’s due to surface reflection.

While to do this normally in realtime you’d have to resort to high-end and extremely complex techniques (i.e. CryEngine 3 has something akin to this), you have three low cost alternatives:

  1. Radiosity computed lightmaps
  2. Pre-calculated ambient occlusion maps
  3. Screen-space ambient occlusion algorithms

While (1) is out of the question at the moment (because the interaction of lightmaped environments with dynamic objects is too complicated to get right), (2) and (3) can be used.

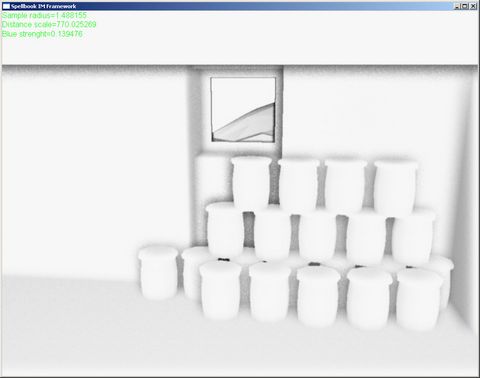
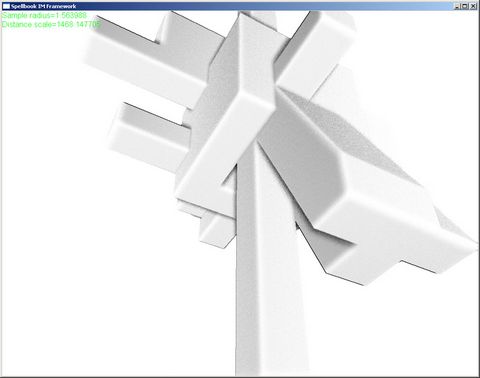
Problem with (3) is that I really only like their effect in Crysis… I’ve tried lots of different flavors of Screen Space Ambient Occlusion (SSAO) before, but results where never to my liking:

abstract_ssao02

azenha_ssao02

Although some of the things that were wrong could probably be tweaked out, I’m very strongly against tweaking stuff (my development time is very short, since I have a job and stuff)…

So that leaves me with (2)…

So I used the lightmap calculator to create some ambient occlusion maps that will be used in the realtime render of the scene.

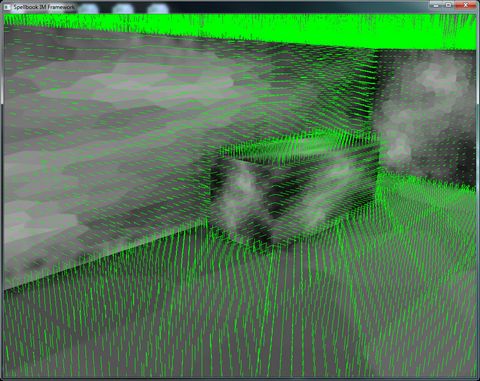
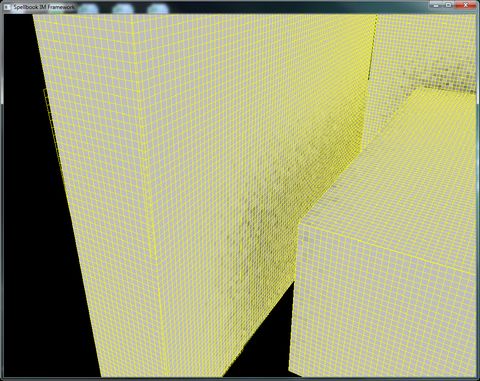
First, I just tried visualizing the points corresponding to the lumels:

01_lumel_point

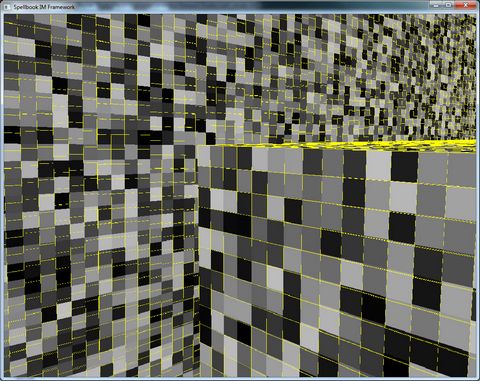
They didn’t seem very right at the time, but I thought it was because of my UV being wacky… Then I did some experiments with simple raycasting and the results were average (no screenshot, I forgot to take one!)… I decided I needed to use multi-sampling to achieve decent results. This is where everything went wrong… I did a first iteration of the rectangle in the lumels area using the gradients of the rasterizer, and these were the results:

02_lumel_area_incorrect

While some of it seems to be more or less right, most is totally wrong… I was expecting the rectangles to encompass a whole lumel, but they weren’t… After some hours of pulling hair, I decided to rebuild my rasterizer, thinking the problem was there… it wasn’t… 🙁

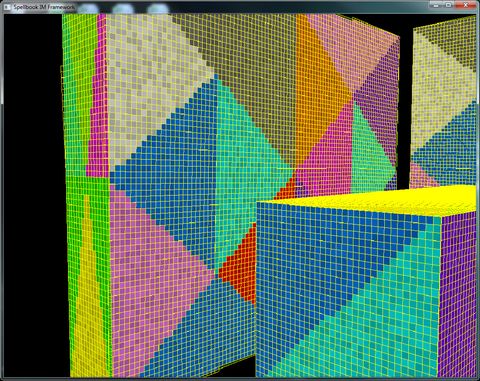
Anyway, after some attempts, I decided to ask for help in the GD-Algorithms Mailing List, and as usual, people came through… Thanks to the help of several people, specially Olivier Galibert, I managed to change my rasterizer and ambient occlusion map generator to barycentric coordinates, which fixed the problems:

03_lumel_area_correct

On a triangle barycentric coordinates are a pair (U,V) such that if (U+V<=1), then P(U,V)=V0+V1*U+V2*V belongs to the triangle.

So, the triangle (and all his properties) are defined through the use of just (U,V) coordinates, which makes everything easier and more precise. Instead of just trying to find spans and filling in the insides with interpolated values, I actually just interpolated the U and V along the triangle edges, and used those values to find all the properties, achieving with this the result above.

There’s still some imperfections on the edge cases, but that’s to be expected, since the triangles edges don’t exactly match the pixel boundaries, but most of it can be taken care with a “bleeding” of the resulting ambient occlusion map.

After I got this right, was just a matter of implementing the raycasting proper…

04_base_ambient_occlusion

I like seeing the blocky ambient occlusion… In the above case, we only have about 16 rays per lumel.

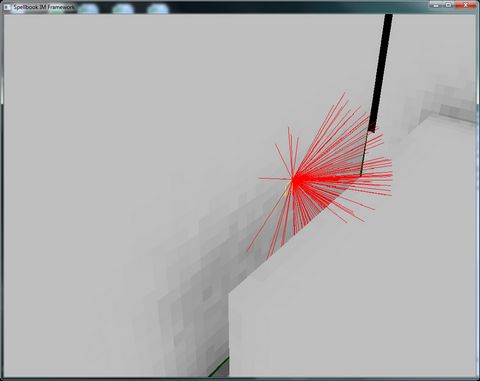
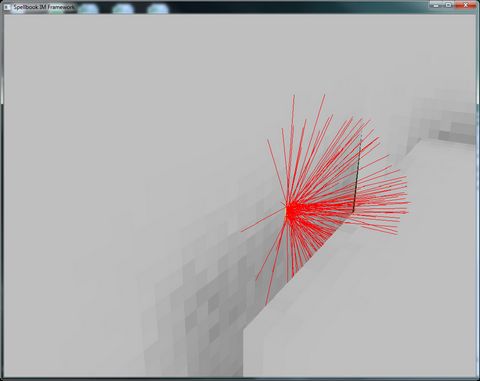
04_ray_casting

Without multisampling, we only cast rays from the upper-left corner of the lumel (in this case it seems to be reversed, but that’ because the UV space is “reversed” in the U direction on that lumel)… Adding multi-sampling:
05_multisampling

We get a more uniform spread… the quality improvement doesn’t show much with this amount of rays, but with loads of them, at the “edges” of the “shadows” of objects, they definitely show.

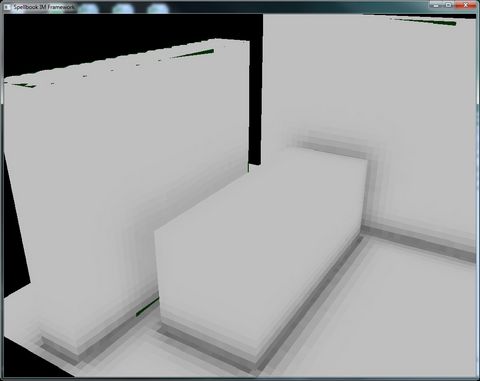
With 1024 raycast per lumel, on a 128×128 ambient occlusion map used by the whole scene:

06_ray_casts_1024_point_sampling

Sampling is set to point, so I can see the lumels properly. Note that there are some artifacts on the top of the box on the left… that’s due to the rasterizer not going “all the way” to the edge… this is solved through bleeding of the texture.

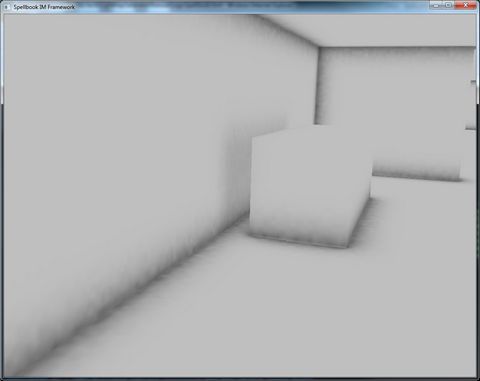
On a larger scene (with some rooms, etc), with 256×256 ambient occlusion maps, 1024 rays per lumel, half-lumel per unit resolution, this was the result.

07_large_scene_256_half_lumel_per_unit_1024_rays

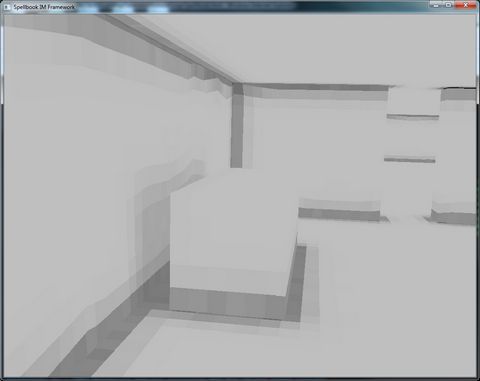
There’s no light sources in the scene, only ambient light, and still point sampling for testing purposes… it looks ugly, but there’s already some feeling of space to it… Turning on linear sampling, increasing the resolution to 1024×1024 and going to 256 rays per lumel:

08_large_scene_1024_half_lumel_per_unit_256_rays

Results are a bit noisy, but they’re already very good for the intended purposes… Adding rays to the scene would get rid of the noise (I think, haven’t tried), but with the additional “noise” of the textures, normal maps and direct lighting, I doubt it shows in a real game situation.

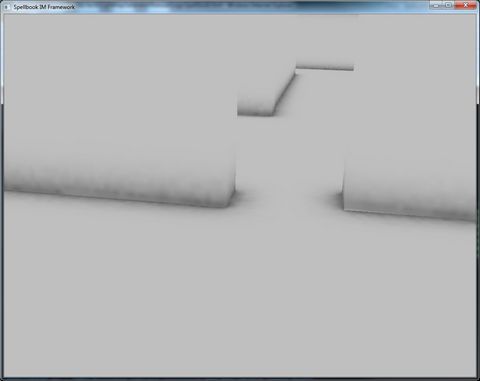
There’s good details on this solution:
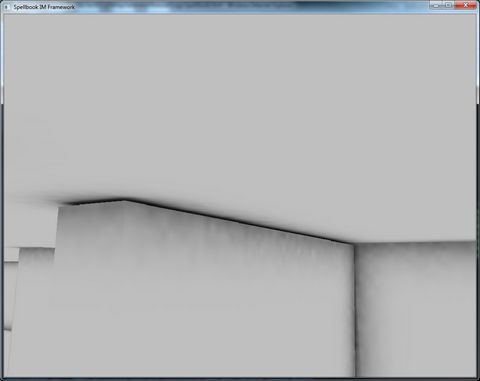
09_large_scene_detail_door

10_large_scene_detail_ceiling

I like this one in particular… The wall doesn’t touch the ceiling (hacked scene, this is what you get), but the ambient occlusion really fleshes out the volume.

I’ve added some code to use multi-processors (since this is software only rasterization and calculation) to speed up the generation of the scene, and the raycasting isn’t as good as it should at the moment (probably will build an octree with all the geometry and use it for raycasting). This scene takes about 4 minutes to compute (resulting in 3 1024×1024 ambient occlusion maps), but hopefully I’ll be able to chop that time down…

My next step is really exporting the generated scene (I’m lazy and haven’t done that part of the code yet, the test application computes and displays the solution), and trying this with a “real” scene (which I’m waiting for my artist to finish, he’s been having some troubles getting some “walls” and “ceilings” he actually likes.

After that, next stop is trying this with direct lighting… I’ve added “soft-shadows” to my dynamic shadowmaps, and they will really help the scene, although they need loads of samples (16) to actually look good… Anyway, I’m hoping that combining the ambient occlusion, the soft-shadows, and playing around with the update times of the shadow maps, I can have a fully dynamic lighted environment that requires little tweaking and is fast enough to work with in the game…

Until next time, cya guys!


Lightmap work…

31 Jan

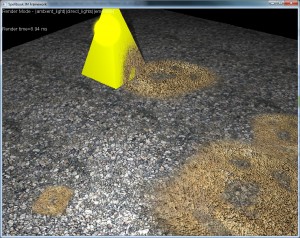
Well, after three days of work, I finally have a working lightmap renderer… I’m not very happy with the results, to be honest, but there’s still some places for improvement… to go further, I need a real example to work with, with some moving characters to see how enabling/disabling lights will work and the effect of having a priority queue for the light updates (so I can have stuff that only updates once every four or five frames)… more on this below…

Anyway, as I said in my previous post, I’m using the UV-unwraper that comes with D3DX, since this is just for a preprocess tool… the results are quite nice, but I had to tweak it a bit…

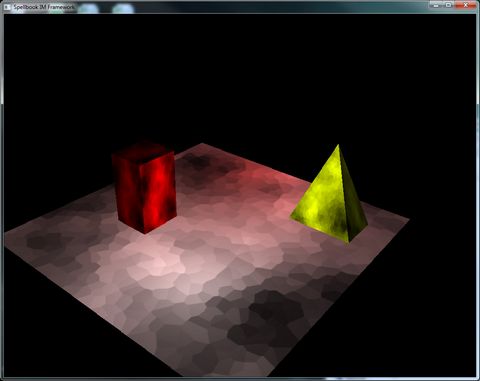
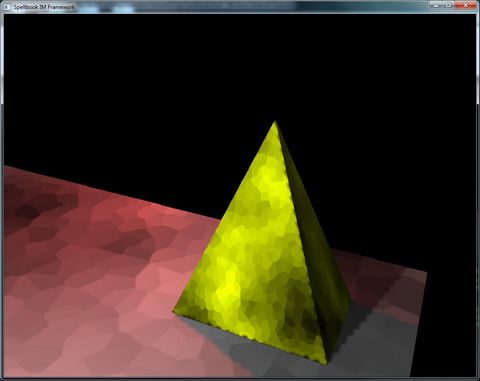
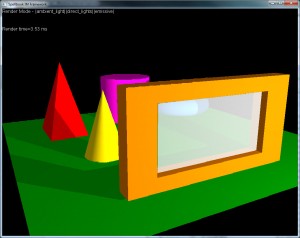
01_InitialScene

This was my first test scene, renderer without shadowmaps in my normal deferred renderer… There’s only diffuse color maps in the objects.

02_FirstIteration

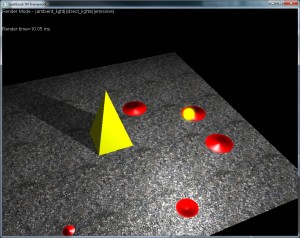
This is the first iteration of the lightmap (rendered in 6 seconds in debug mode, a single 256×256 map).

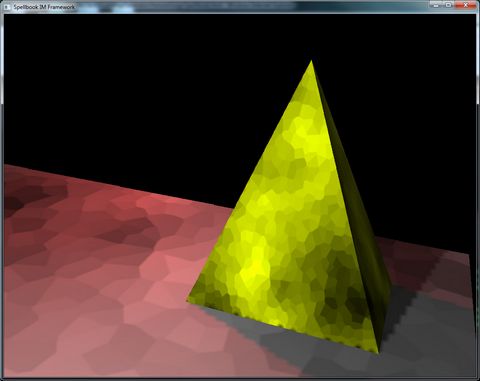
03_EdgeArtifact

A closer look shows some edge artifacts… This got solved by simply doing a "bleed" effect on the generated lightmap.

04_BleedTexture

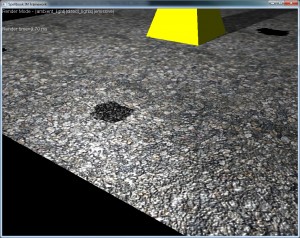
The black spots in the bottom of the pyramid are due to sampling artifacts (since it’s at the same height as the plane, so it intersects). This can be solved through multisampling (on my wish list).

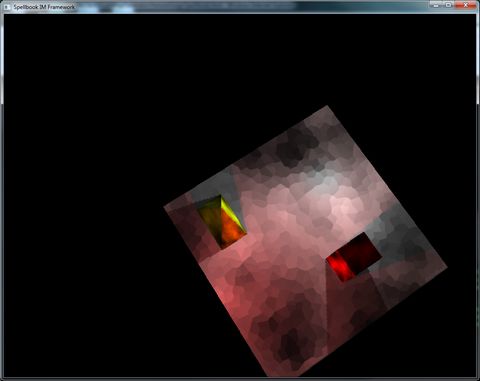
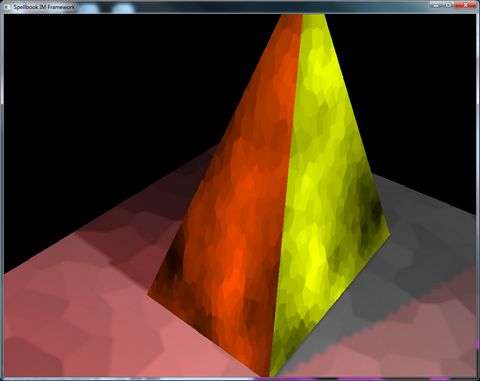
05_Discontinuities

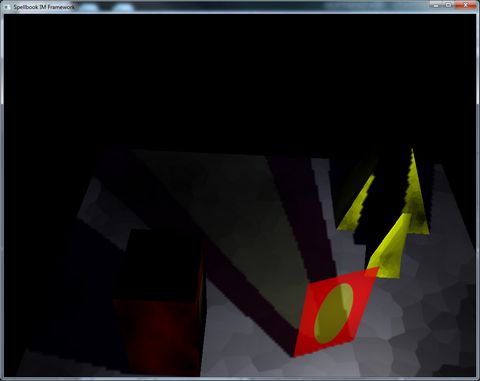
Here I had a big error (didn’t take a screenshot), where the orange and the yellow would fight, since that edge was shared in the lightmap. Fixing this was just a matter of tweaking the UV generation so that that edge wouldn’t be shared; so I added code that took in consideration that triangles whose normals differed more than 30 degrees wouldn’t be considered adjacent, and the results were good.

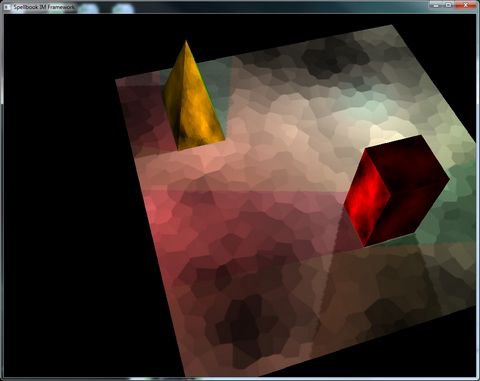
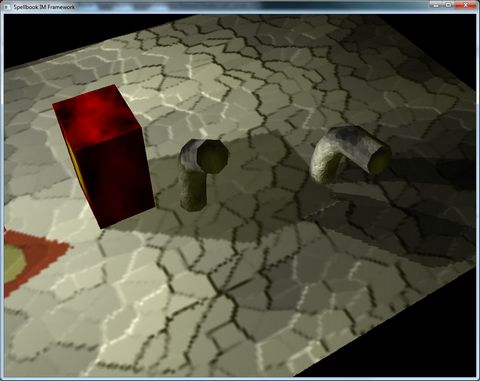
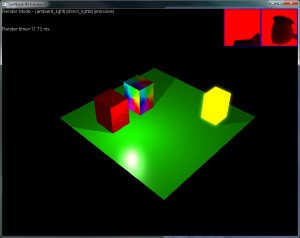
06_DynamicAndStaticLights

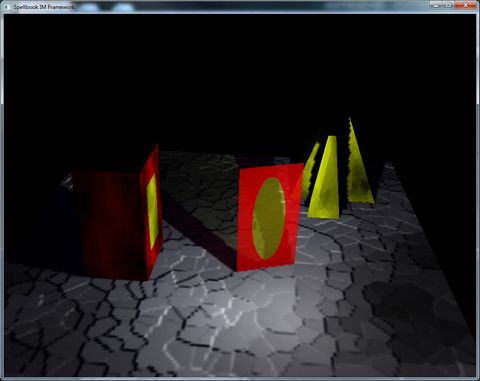
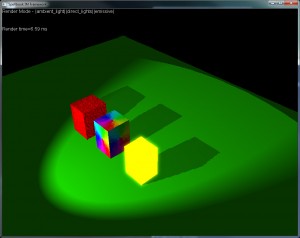
Mixing static and dynamic lights worked well. The red shadow cast by the red block is the result of a light circling the scene. Note that the edges are much more defined.

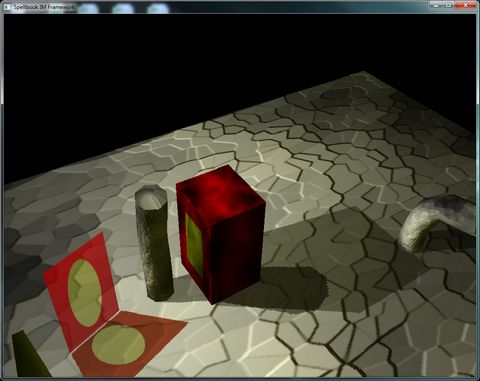
07_AlphaMaps

Adding the stained-window effect was pretty easy with the current system, and I love it, to be honest… 🙂

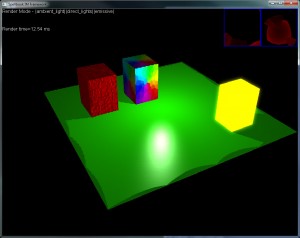
08_NormalMaps

Adding normal mapping was also pretty easy, but problems become evident when we zoom in:

08_NormalMaps_LowRes

The lack of resolution of the lightmap shows pretty obviously… I think this can be solved through multisampling, or just doing a better sampling of the normal map to consider the resolution… But it’s pretty obvious that normal maps won’t work well in lightmaps, since lightmaps are good for low-frequency lighting, and normal maps add high-frequency data to it… There’s other solutions for this, like what Valve did in the Source engine: http://www2.ati.com/developer/gdc/D3DTutorial10_Half-Life2_Shading.pdf

This considers the direction in which light is coming and applies normal mapping in runtime on top of the lightmapping, which improves quite considerably the results, besides enabling us to use specular highlights aswell. Still need to think if this is worth implementing, since I’m not sure about lightmaps anyway… Since I have my own renderer, I can change it suit me…

09_DynamicObjects

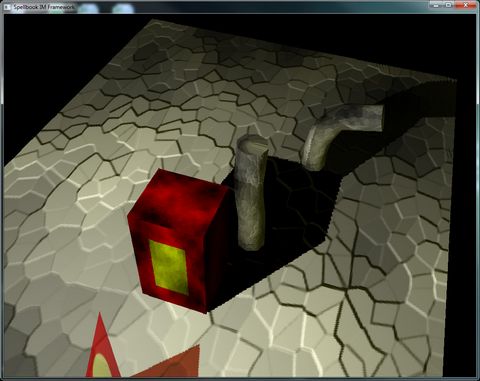
The worst problems came with the dynamic objects… Casting shadows on dynamic objects is simple enough, just use the standard shadowmap technique… Problem is that dynamic objects cast shadows on static (lightmapped) objects, and this is where things become complicated…

The way I solved it was by rendering the static lights three times… First time is the generic lightmap pass, in which all static objects are rendered, and a stencil mask is created. 0 on the stencil buffer means that pixel comes from a dynamic object, 1 means its from a static object.

Second time it’s for the dynamic objects (stencil buffer=0), and the results are as expected (both the static objects and the dynamic objects cast shadow on the dynamic objects).

Third time it’s for the static objects (stencil buffer=1), and it requires a subtractive pass… Basically, for each pixel of static objects, I compute the light that would reach that point, check if the point is being shadowed and subtract that light from what’s in the render buffer. Problem with this approach is that the lightmapped shadows will be twice as dark, since they’re already present in the shadowmap and the value will be subtracted.

To fix this, I had to find a trick, which almost does it… Basically, when rendering the shadowmap, I render the pixels in the [0..1] range if the object is static, and in the [1..2] range if the object is dynamic. Then, when I’m computing the subtraction, I only account for the dynamic objects (since the shadows cast by static objects are already accounted for in the lightmap). As I said, this almost works, with two caveats:

10_DynamicObjects_Artifact01

In this screenshot, you can see the "ragged edge" between the static-cast shadow of the block, and the dynamic-cast shadow of the skinned cylinder… This is due to the resolution of the shadow map, and it’s extremely hard to get rid of, without raising the shadowmap’s resolution to proibitive values… I think we might be able to solve this by multi-sampling the shadowmap, but that would required more cycles, and for the game we’re working on, I don’t think these small mistakes will matter…

A slightly worse problem:

11_DynamicObjects_Artifact02

The shadow from the cylinder in this case subtracts light to the block-cast shadow, which shouldn’t happen… This is due to the fact that the computed shadowmap only "sees" the cylinder, and the block behind, so the system doesn’t know that the block is also casting a shadow at that pixel… I can think of a couple of ways to solve this (two different shadowmaps for static and dynamic objects, for example), but most of them just consume more GPU/memory/etc, and for a small gain…

Finally, the biggest problem: due to the limited precision of the render buffer (8-bit per channel), if we have multiple lights illuminating a place and casting a shadow on that place, the shadows will become darker than they should… Reason for this is the following:

Imagine 2 lights, illuminating a certain pixel… Light A casts 80% light, light B casts 60% light… Summed together, this is 140% light, which gets clamped on the buffer to 100%. Then, we want a dynamic object casting a shadow on that spot (because it blocks light B). Because of the current algorithm, light B is subtracted to the frame buffer, which makes the intensity there go to 40%, instead of the 80% it should…

This could be fixed with HDR buffers (which wouldn’t be so hard to add), but by this time I’m under the feeling that I’m just fixing one problem after another, without having a complete lighting solution, or worst, having a complete lighting solution that requires too much tweaking…

So now I’m thinking that I may ditch all of this and go for a full dynamic lighted system. Of course, I can’t have 100 lights casting shadows, etc, but I think I can reduce this substantially by making lights that aren’t near the player use less resolution and updating less frequently, and go around interpolating the lights to get the correct results… Now I just need a working scenario so I can see the impact of this, with some characters moving around and some real geometry to check perfomance…

Anyway, this isn’t a complete lost… worst case scenario, I’ll be able to use this system to create ambient occlusion maps to get a bit more realistic look without having to resort to SSAO (which I only liked in Crysis)…

Unfortunately, for the next foreseeable days, I’ll be busy with hard work stuff, which means no energy in my free time to work this…

Stay tuned for more adventures with lighting pipelines! 🙂


The Quest for Lightmaps

25 Jan

Finally some of the work insanity has died down, and as so I can go back to do some cool stuff on my spare time again…

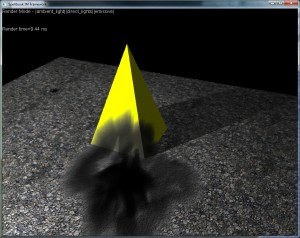
After the basis of the renderer for our next project is done, I still feel there’s loads of stuff to be done in the environment lighting… since it is unfeasible to have shadowmaps in all visible lights (still have to determine a good algorithm to select lights to be shadowmapped in real time),I’ve decided to add lightmaps to the environment, and in the process (since it’s easy to add), also add pre-rendered ambient occlusion maps.

I’ve worked on lightmap generators in the past.

First of my experiments were with direct lighting lightmaps, which only account for the light that shines directly in objects. I built my own UV-map generator, which didn’t work that badly, but it was slow and some of the results were terrible… The advantage of that renderer was that I could add stained-window effects (through alpha maps) and other nifty effects to the resulting lightmap…

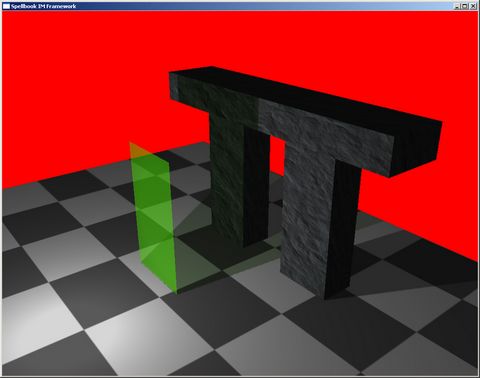
Some pictures of the obtained results (over 3 years ago):

lightmap_only_direct

Two sources of light, one red and one white, no textures.

multi_light_textured

Same as above, but textured, which makes everything look infinitely better, since it disguises the imperfections of the limited resolution of the shadowmap.

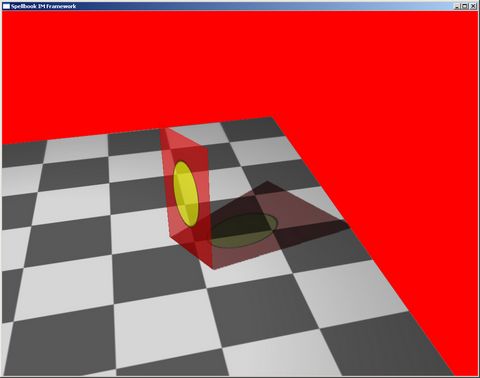
lightmap_alpha1An alpha object that blocks part of the light and tints it.

lightmap_alpha4

Again an alpha object, but with a textured alpha-map… The effect is quite nice.

Although the results I obtained with this were nice enough, I was never too happy with the UV-generation and the lack of soft-shadows, so a couple of years ago, I did some experiments with hardware-accelerated radiosity.

I replaced my UV-generator with the one that DirectX 3DX library has, and used the normal HW-accelerated radiosity algorithm (render scene from the point of view of the patch, average results, rinse and repeat).

While the results weren’t terrible, it demanded too much tweaking to get good results:

radiosity02_uv_work_no_iterations

The wall is an emissive light source.

radiosity07_render_iteration_06_075

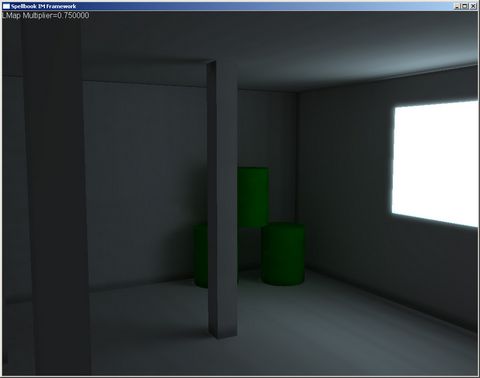
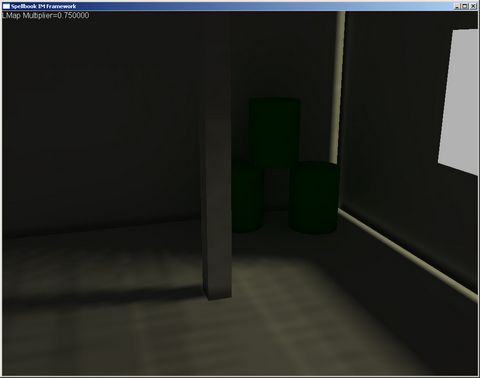
After 6 iterations, the shadows become more “real” and you can see some color blending near the green “barrels”, which is pretty neat. The window is a glowing polygon, to simulate intense outside light.

radiosity08_render_iteration_06_075

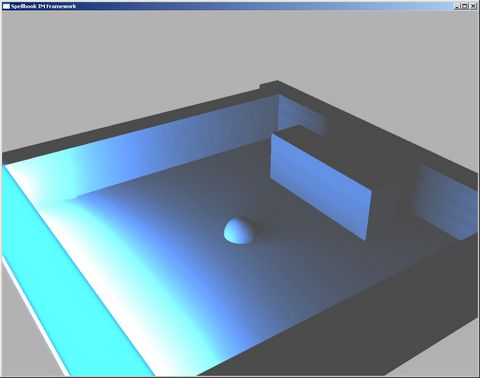
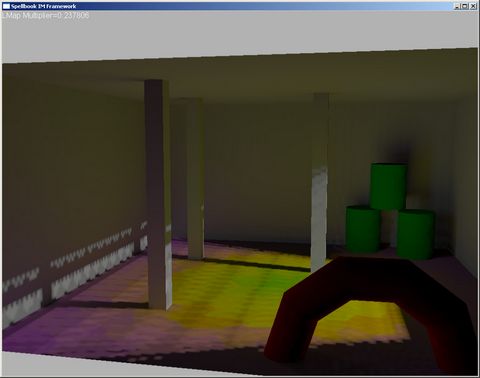
Using a light that’s not white, and a spherical light source (with volume), that’s not visible from the whole room. After 6 iterations, the scene looks warmer, but it has too many artifacts on the floor (sampling artifacts), and in the near wall (because the wall was too close to the patch, it wouldn’t get drawn in the buffer, due to the near plane. This would lead to that silly illumination).

radiosity10_colored_floor_iteration01

Using a colored floor (at a much lower resolution that the previous tests), the scene again becomes warmer and indirectly lit.

radiosity12_normal_pass01

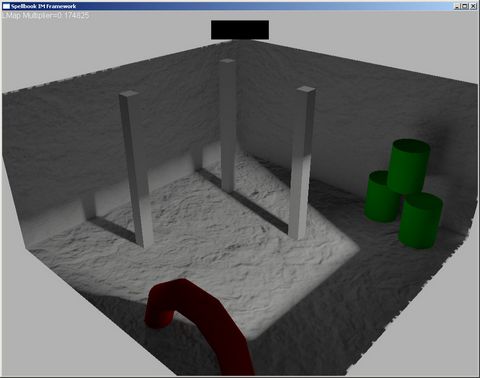
I supported normal maps in the rendering, and the result is quite nice, disguising some artifacts behind the more complex lighting.

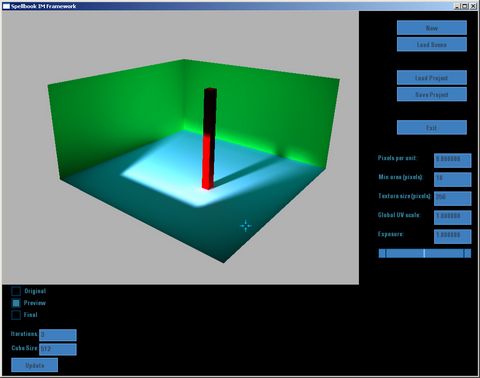
I even did an application that would enable me to change the reflectivity parameters:

radiosity16

But it was too much work getting this to work properly, too many small tweaks and too much time to actually see results… This is when I abandoned this project and moved on to other stuff (I know, I lack focus sometimes).

Anyway, back to the present, I decided to pick this up again… For the current game, I think radiosity is overkill, but I intend to divide the generation of lightmaps in two parts, so I can replace the direct lighting for radiosity later:

  • Preprocessor
  • Lighting engine

Basically, the preprocessor will take care of all the tasks that are common to any lightmap processor:

  1. See what meshes are present in the scene
  2. Create UV-map per mesh (using as a metric for resolution the surface area of the mesh and an adjustable parameter)
  3. Create instances of objects that share the same mesh (effectively copying the mesh with the new UVs)
  4. Create an UV-atlas that aggregates UV-maps
  5. Load into RAM the textures used (diffuse map, alpha map, normal map, emissive, etc). This data needs to be in accessible memory since we’ll need to sample it
  6. Initialize the lighting engine (give it all the meshes, etc, so he can build acceleration structures for raycasts, etc)
  7. For all lumels in all the lightmaps, call the light evaluation function on the lighting engine. This will probably be called multiple times for each lumel, taking into account the possible area of the lumel, so that we get anti-aliasing and reduce the artifacts caused by edge conditions. These samples will be averaged (either by standard average or some kind of distribution).
  8. This last step will be repeated a certain ammount of times, depending on the instructions of the lighting engine.
  9. If requested, build ambient occlusion map, by requesting the lighting engine an ambient occlusion factor. This will also take in consideration the area of the lumel, like in step 7.
  10. Save lightmaps generated

The lighting engine for now will be a simple Direct Light system. I want to take in consideration the following things:

  1. Take into account diffuse, normal and emissive maps
  2. An octree will be generated with all the world geometry for faster raycasting
  3. Raycasting will take in account the possible intersection of alpha/tinted objects and do the correct coloring to account for that
  4. Ambient occlusion will be computed by raycasting in an hemisphere around the lumel being computed, and considering what amount of rays gets intersected.

This system should also consider multi-processor usage (for direct light at least, since the HW-accelerated radiosity can’t take advantage of multiple processors, since there’s just one GPU).

Most of this stuff I already know how to do, since I have in done in previous projects… the exception is the octree generation (I usually use loose octrees, so there’s loads of code for splitting triangles, etc, that has to be done), and the part where I consider the area of the lumel for smoothing the lightmap.

Rendering the lightmaps in the deferred rendering pipeline will require an additional passage, since I don’t have any space left on the G-Buffer for three components (RGB, since I want colored lightmaps), but that’s ok, since it will enable me to do fill up the stencil buffer to avoid drawing the static lights onto the static geometry again, while I still have the possibility of using the static lights on the dynamic geometry. This will also enable me to light the environment with dynamic lights (in static and dynamic geometry) without wasting too much performance. Adding the concept of light volumes to both types of lights will also be easier this way, since I can filter out what parts of the scene shouldn’t be affected. The ambient occlusion term can be stored with the ambient component already in the G-Buffer, so that shouldn’t have a big performance hit.

All the lights and geometry that are present in the input scene will be considered static… Bad part of this is that opening doors won’t have the dramatic/cool effect I would like, unless I use dynamic lights and shadowmaps at the correct circumstance.

Anyway, I’ll hopefully have something working by next week (hopefully in time for the Screenshot Saturday thingie which I enjoy seeing every week).

Ah, just recalled… why do my own lightmap generator, instead of using an existing (free) one? Well, I never found one that produced nice results while making the trouble of writing an importer/exporter wasn’t a nightmare, to be honest… I feel that this is the kind of thing that’s kind of linked with your pipeline and your own way of doing stuff… besides, this is fun code! 🙂
So, wish me luck!


Season greetings!

27 Dec

Happy holidays everyone! 🙂

Hope you all had a wonderful Christmas and are planning a smashing New-Year party!

This year, everything was a bit chaotic (because of work and other stuff)… But all went great, and I got a new “Band Hero” from my wife, which is win… Unfortunately, I never guessed I would suck so hard at drums, but I’m improving, practicing in the “slow” setting (oh, the humilliation!).

I’ve finished the first version of the new 3d Studio plugins, to be used in our upcomming secret project (for now)…

Basically, I added on top of the existing plugins (which were already very useful) the deferred rendering part, taking the oportunity to clean up the shader system…

Below, you can watch a video of it in action:

I’ll probably won’t be able to post in the next days… work has been pilling up in the Christmas madness, besides getting ready for the New Year’s Eve… Have to prepare my resolutions for next year! 🙂


Work, work, work…

14 Dec

Well, as some of you might know, I have a real job in telecom-related software development…

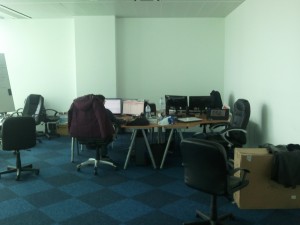
I’ve changed jobs in September or so, and moved to a new office in Lisboa. Since we already had projects that had to be finished, we didn’t have much time to take care of the office… that’s why, 3 months later, the office just had his floor done, and this is the current look:

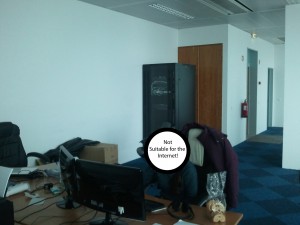
Lots of mess and clutter still… Another view:

Anyway, we’ve just delivered a big project, a provisioning system, which was very hard to do because we had to master completely new technologies for us: PHP, Java, Google Web Toolkit, MySQL… All these technologies are used to do the frontend for the system, with a C++ backend (all done in Linux, which is also new for me; mastering makefiles sucks)…

So it was a challenging project, but ultimately it was rewarding, since everything worked with just minor tweaks… Now we have some stuff to add on it, but it shouldn’t be a big problem, since the core system is done…


Distortion Buffer

10 Nov

Was intending to write the second part of my IGF2011 analysis, but didn’t have time because of silly bugs on the shadow systems… The code that chose either the “front” or “back” shadowmap (for my dual paraboloid shadow maps) was wrong, and it took me forever to see where the problem was…

Anyway, completed the distortion buffer work… still have some issues “controlling” the effect, but it will have to wait for the artist to put his hand on it to see exactly what is the best course of action for this…

Hopefully I’ll have a bit more time tomorrow and will be able to post my initial plan…


Stuff I’ve been doing…

08 Nov

Haven’t updated this with news on what I’m doing for a while…

Well, my life is a bit boring at the moment, working on some projects for my day job… the rest of my time I’ve been working on my deferred renderer for my yet-secret project…

First up, I’ve added a decal system, which looks pretty sweet… With it, I intend to add some variety to the game areas:

This works by extracting the geometry affected by the decal (using a clipping algorithm against the decal bounding box). Then this geometry is drawn onto the G-Buffer, which means that the decal is correctly affected by the lighting of the scene. Since there are too many permutations of the shaders used to affect the G-Buffer, I’ve built a small tool that auto-generates the shaders, according to what you want to modulate, etc.

In the examples above:

  1. Overriding just the color component of the G-Buffer
  2. Overriding the color and normal component
  3. Overriding the color and normal, and halving the specular power/gloss components
  4. Overriding the color and normal, and nullifying the specular power/gloss components

This has the drawback that this kind of decals don’t affect alpha objects, which is a separate pass. The rationale behind it is that there are other techniques that can be used in those particular cases, and lighting of the alpha objects is done through a multipass lighting system.

Second, I added the alpha object rendering system:

The renderer uses the standard multipass renderer I’ve had in Spellbook in the past. This pass is also used if we want to use different kinds of lighting models besides the standard Phong one. This is a completely separate pass, which doesn’t affect the G-Buffer (and hence doesn’t write to the depth buffer render target, only to the standard Z-Buffer). Alpha objects are rendered back to front, and can’t have emissive component (that can be simulated with pre-multiplied alpha).

Finally, I just added a Depth-of-Field effect:

On this video, the most visible effect is changing the focal distance. The effect is done by rendering a blurred version of the rendered scene and by lerping between the blurred and not-blurred version, based on depth (or more precisely, the difference between the depth and the focal distance, considering the focal range).

Next step on this renderer is the screen space distortions, to use with explosions and stuff, which is simple to execute but hard to control from an artistic standpoint.

Besides all this techy stuff (which is really fun for me!), I’ve been playing stuff (as usual):

Trying to get the “Loremaster” achievement done before Cataclysm comes out. It’s fun revisiting some of the early areas, and seeing some of the lore I missed on vanilla WoW… Drawback is wondering all the time “how did I loose so much time playing this, these areas are awful!”.

Finished this one… I was pleasently surprised by it… I was never a huge fan of Transformers (even when I was young… I’d watch it and think it’s cool, but it didn’t have that big of an impact on me as most of the nerds I know!). But it is a very competent shooter, with a nice enough storyline (just wish they added some more of “lore” onto it, like who are exactly the Primes, and what’s the story behind Optimus, since the game for a time hints at a revelation that never comes). The neat part of the game is that it’s actually fluid switching from “vehicle” mode to “giant robot” mode, with advantages in both and different types of fun (specially the flying ones). I’m giving it a 8/10.

I was really looking forward for this one, having loved the first one… and while the game itself didn’t let me down (this is exactly what fighting with the Force should feel like!), the story is one of the worse I’ve seen in the last years… paper-thin, just an excuse to move from stages to stages (kind of reminds me of the terrible narrative of “Heavenly Sword”) killing stuff… but while “Heavenly Sword” was boring and predictable (from a gameplay standpoint), FU2 is fun and engaging.

Really, if the story wasn’t so terrible, it would be one of the best games ever… but the story as it is detracts from the fun… it goes against Star Wars lore, the endings are silly (both the light side and dark side one) and the characters are as badly characterized as it is possible (well, that part is on par with the “Star Wars” movies, to be honest).

The graphics and sound are top notch (the graphics really impressed me, sometimes they deserved the name “photorealistic”), although some areas were too empty to be credible (missing clutter and “function”). And the gameplay is amazing… it’s extremely fluid going from “lightsaber fight” mode to “force-using” mode, which makes for some very neat fights, very dynamic in their approach.

This game could easily have ranked a 10/10, but since the story is so miserable, I’ll give it a 9/10. And I feel sorry for that, since the first one had a story that really compelled you and mashed well with the Star Wars lore…

And that’s it for today… Hopefully, in this week I’ll have the third installment of “Games of my Life” and the second one of “IGF2011 games”…


Point lights

06 Oct

Got shadows for point lights working:

Had some issues getting it to work:

The errors in the shadows are noticeable in the areas in between the vertexes.

Initially, I thought the problem was that I was a pixel shader/vertex shader mismatch, since when I was creating the shadowmap, the vertex shader for it did most of the computation and the pixel shader was just a simple passthrough, and when I was “applying” the shadowmap, all the calculations were done in the pixel shader.

After I corrected that (passed most of the computations for the pixel shader on the shadow map phase), the problem persisted… I got pissed about that, and after much scrounging around I found the problem…

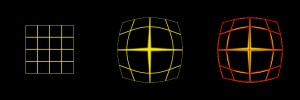
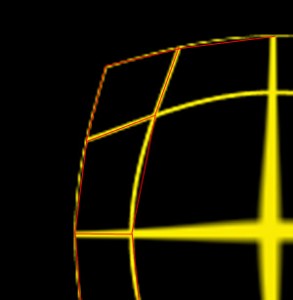
The issue had to do with the projection of the geometry in the shadowmap… As I’m using a dual-paraboloid map, I have to create a “fish-eye” perspective of sorts when generating the shadowmap. This works fine, but I didn’t take to account lowly tesselated geometry near the light source (because the perspective transformation is done at a vertex level):

So, originally we have a tesselated square… If we apply the spherical projection we need for the “fish-eye” effect, we should have something rounded like we see on the second picture… But, as we are only applying the math to the vertexes, we in fact get the red lines, instead of the rounded edges…

On a zoom:

In the middle of the object, that’s not a big problem… there will the wrongfully drawn shadows, but we won’t notice them… Problem is on the outer edges of the object, in which we would fetch texels outside of the “drawn area” of the shadowmap!

Thankfully, the solution for this problem is simple enough: just clear the shadowmap to the maximum distance, to insure that all the areas outside of the “drawn area” are never shadowed… this is potentially wrong, but it should be close enough to never be a problem…

Anyway, they look neat and are fast, which is the two main points in all of this… I’m thinking I’ll have probably two or three shadowmapped lightsources on screen at a time… Need to devise a way to reuse the shadowbuffers of lights that don’t need them at the moment (since I’m currently using 32 bit floating point shadowmaps, which are huge memory hogs!), but that shouldn’t be an issue…

Next step, directional lights!


Shadows and Fractals

29 Sep

Video of the first test of deferred rendering with a spotlight casting shadows, through use of a shadowmap with 256 by 256.

This video was taken in debug mode, hence the speed (which is pretty impressive nevertheless).

All light sources in this renderer can be shadowcasters or not, which will take different code paths in the renderer, to minimize DIP calls.

This is for the new game project in which I’m involved (no information on this yet… please be patient, eheheh)…

The ideia is to have a fully fledged deferred renderer to power the game… Currently I’m adding shadow support (through shadowmaps)… I only have spotlight support, but the rest should be done easily now that the hard part is over… Still want to add blurring to simulate soft-shadowing (and to disguise some bad artifacts as you can see in the video).

On another note, check out this extremely amazing video:

Although I’ve done some study of fractals in the past, I have no idea on how to get the third dimension on a Mandelbrot set, to be honest…
But the shading and texturing work give it so much atmosphere… It’s one of the most impressive videos I’ve ever seen on pure computer graphics…


Ludum Dare results are in…

08 Sep

…and “Conquest” placed 9th! This is my better mark ever. There was 172 games in the compo, so this result makes me very happy! 🙂

In specific scores:
Innovation: 12th
Fun: 19th
Theme: 4th
Graphics: 23rd
Audio: 13th
Humor: 30th
Community: 3rd
Coolness: 5th
Overall: 9th

It’s nice to see that my perception of the game (i.e. I think it’s the best I’ve ever done in these competitions) is matched by other people’s perceptions (my best placement ever)…

Apparently everyone thought the game was too slow, which I think was unavoidable (or else people wouldn’t be able to play it, with all the other interface issues I’ve seen on the game)… Balance was off aswell, but it was fully playable, polished, and had a nice concept that I will extend one of these days, when I can find the time for it (hard with my new job).

Anyway, this post comes directly from Appledoorn in the Netherlands, where the HQ of my new company is located (Divitel)… I’m starting a new job now, so I’m setting up (with my partners) the Lisbon office of Divitel, which will be a new company called Divitel Development, focused on Software Development for the telco market… I’ll also be attending the IBC, to get a better understanding of the market we’re moving into.

Hopefully, this new venture will prove better than the last ones… 😉